

Accessory Kit List
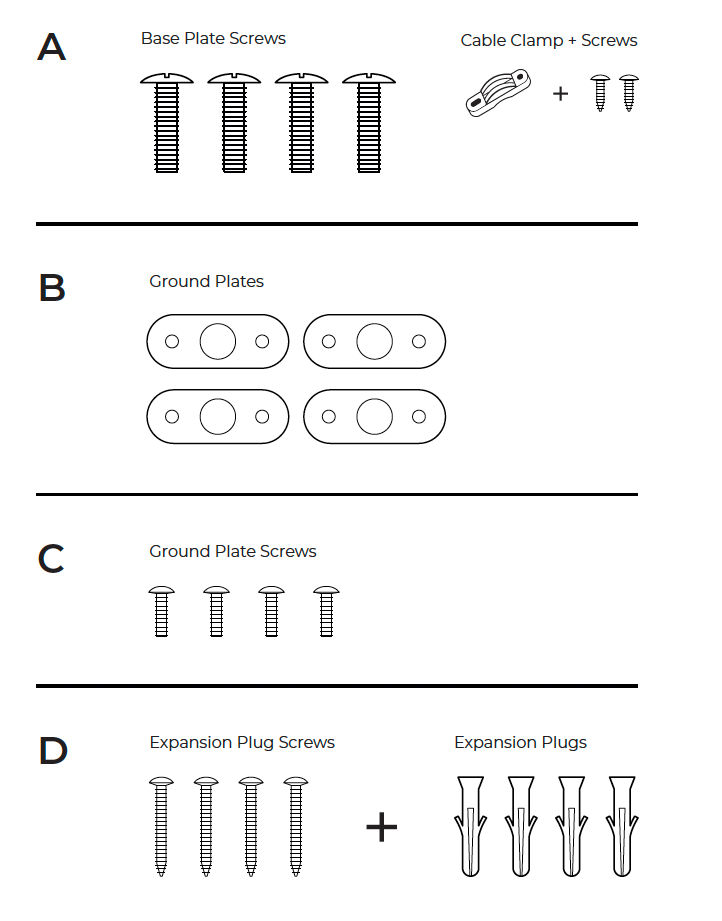
Infrared Heater Assembly Steps
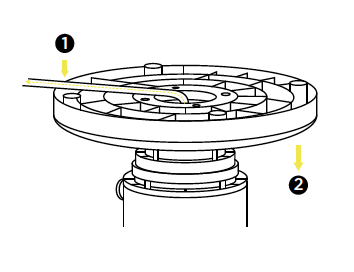
1️⃣ Pass Power Cord Through Base
Feed the heater’s power cord carefully through the opening in the base.
Ensure it sits neatly inside the cable channel on the underside. This will prevent accidental pinching or damage.
2️⃣ Secure Base to Heater Body
Align the base with the bottom of the heater.
Firmly press it into position, ensuring it locks securely.
Double-check that the power cord remains properly placed in the cable channel.
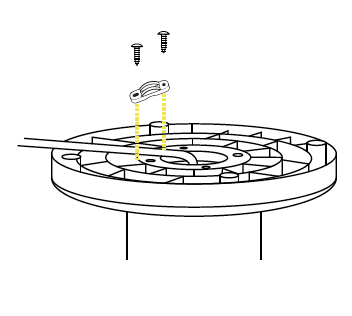
3️⃣ Attach the Cable Clamp
Place the cable clamp over the power cord where it meets the base.
Use the two screws (from Accessory Kit A) to fix the clamp in place.
This step ensures the cord stays secure and protected from strain.
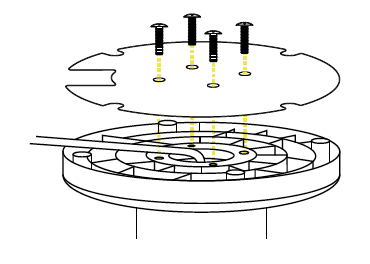
4️⃣ Secure the Base Plate
Use the four base plate screws (from Accessory Kit A) to firmly attach the base plate to the underside of the heater.
Tighten each screw evenly to ensure stable support.
Battery & Remote Setup
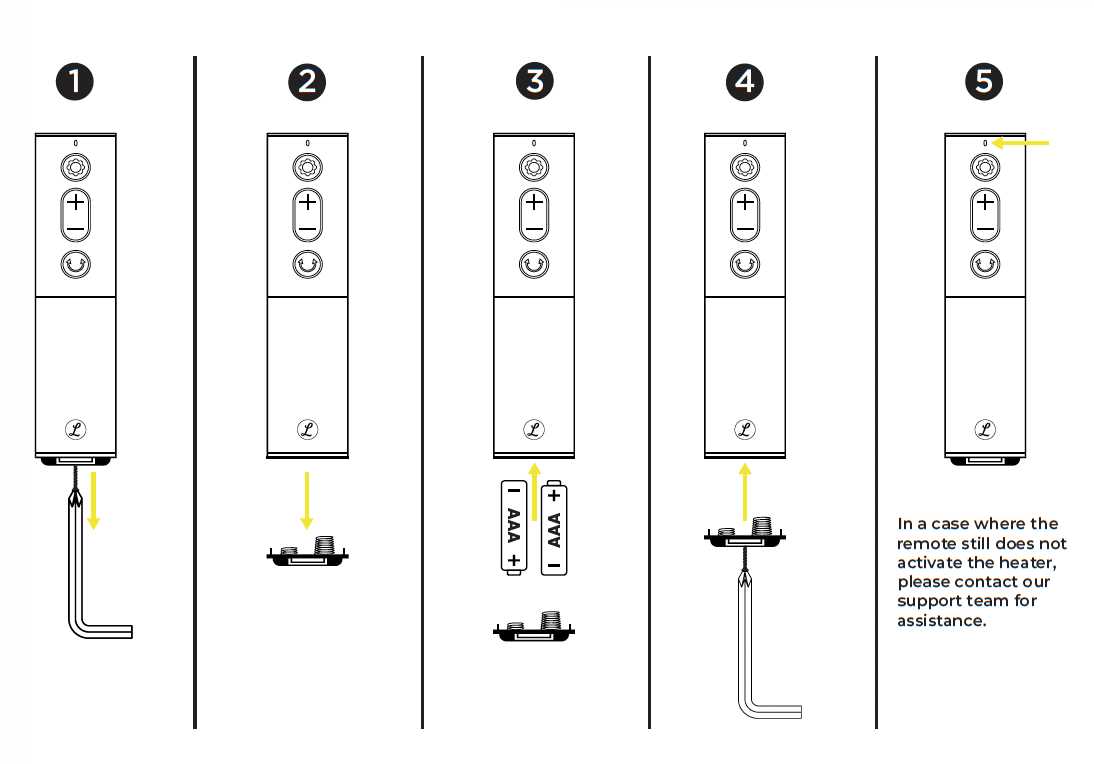
To ensure your remote works properly, follow steps 1–5 in the illustration below to insert the batteries correctly. Make sure the batteries are aligned as shown to guarantee proper function.
⚠ Final Safety Check
Ensure all screws are tightened properly.
Check the power cord is undamaged and securely clamped.
Verify the heater is stable and level on the surface.
💡 Troubleshooting
If your remote control is not activating the heater after setup:
✅ Double-check the power supply.
✅ Ensure the heater is plugged in securely.
✅ Make sure the remote has working batteries.
✅ If the issue persists, please contact our support team for assistance.
🛑 Important Notes
Only use the heater on a dry, flat surface.
Do not operate if any parts appear damaged or loose after assembly.
For outdoor installations, ensure the IP45 rating is maintained by securing the unit properly and avoiding water exposure on plugs.